We are giving only Child Theme of WHMCS's default template twenty-one. We did not change anything except the design and some custom hooks for design purpose.
Prerequisites:
Then follow our documentation's instructions to install our WHMCS template.
We have designed the WHMCS template and orderform. you need to follow the below steps to complete the template installation completely:
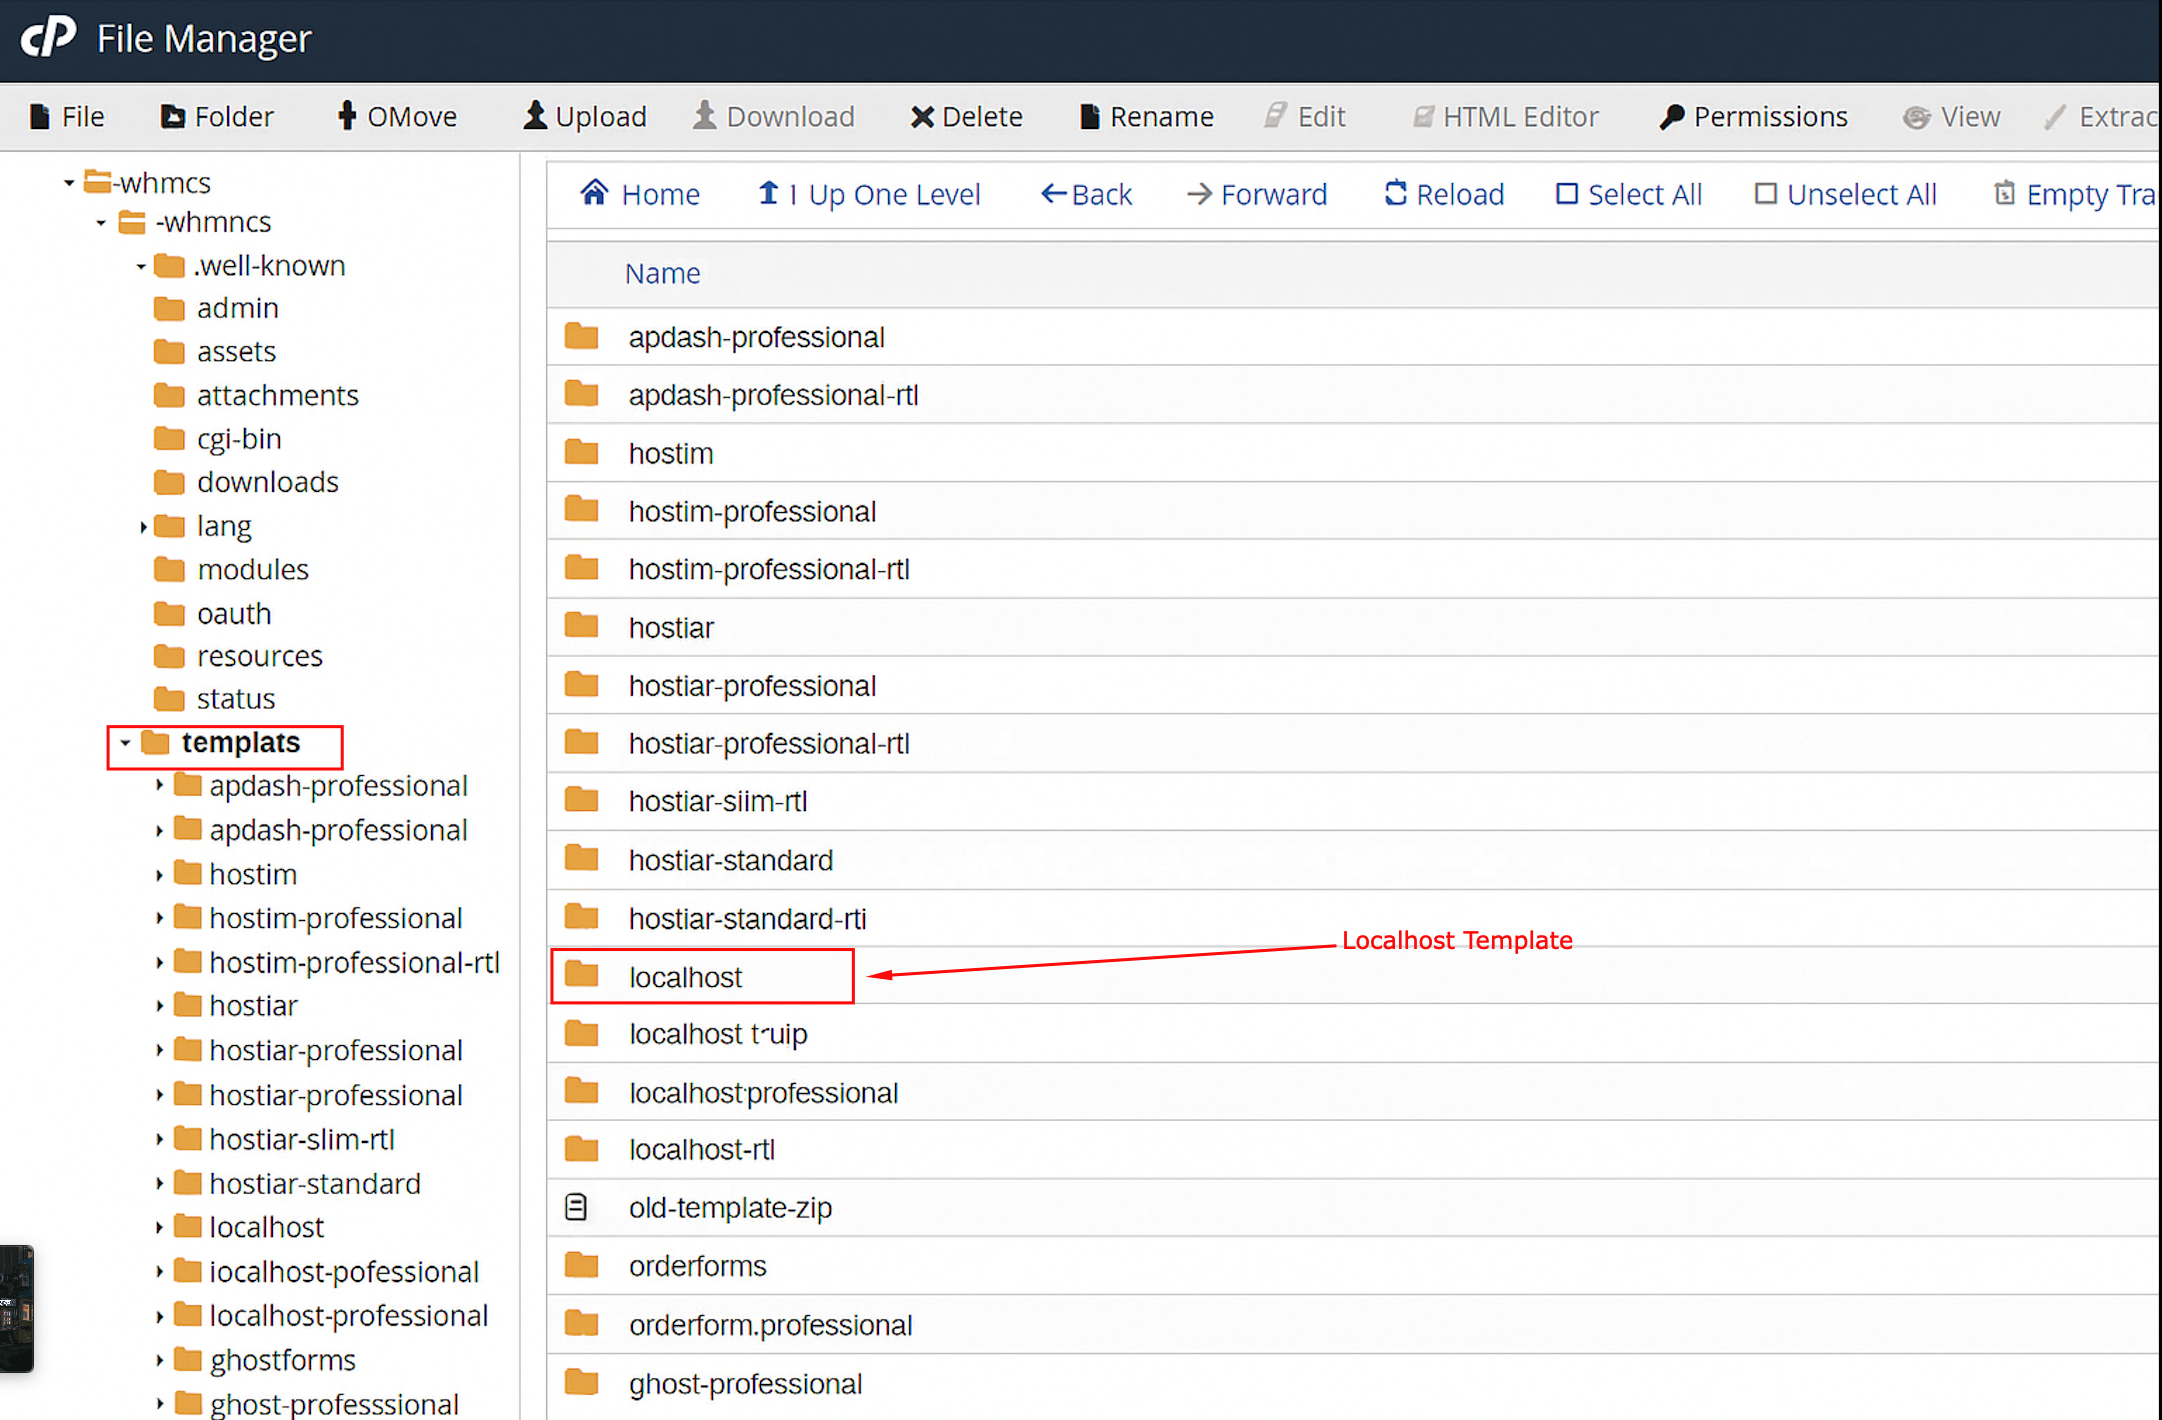
Add your WHMCS template "localhost" to the templates folder.
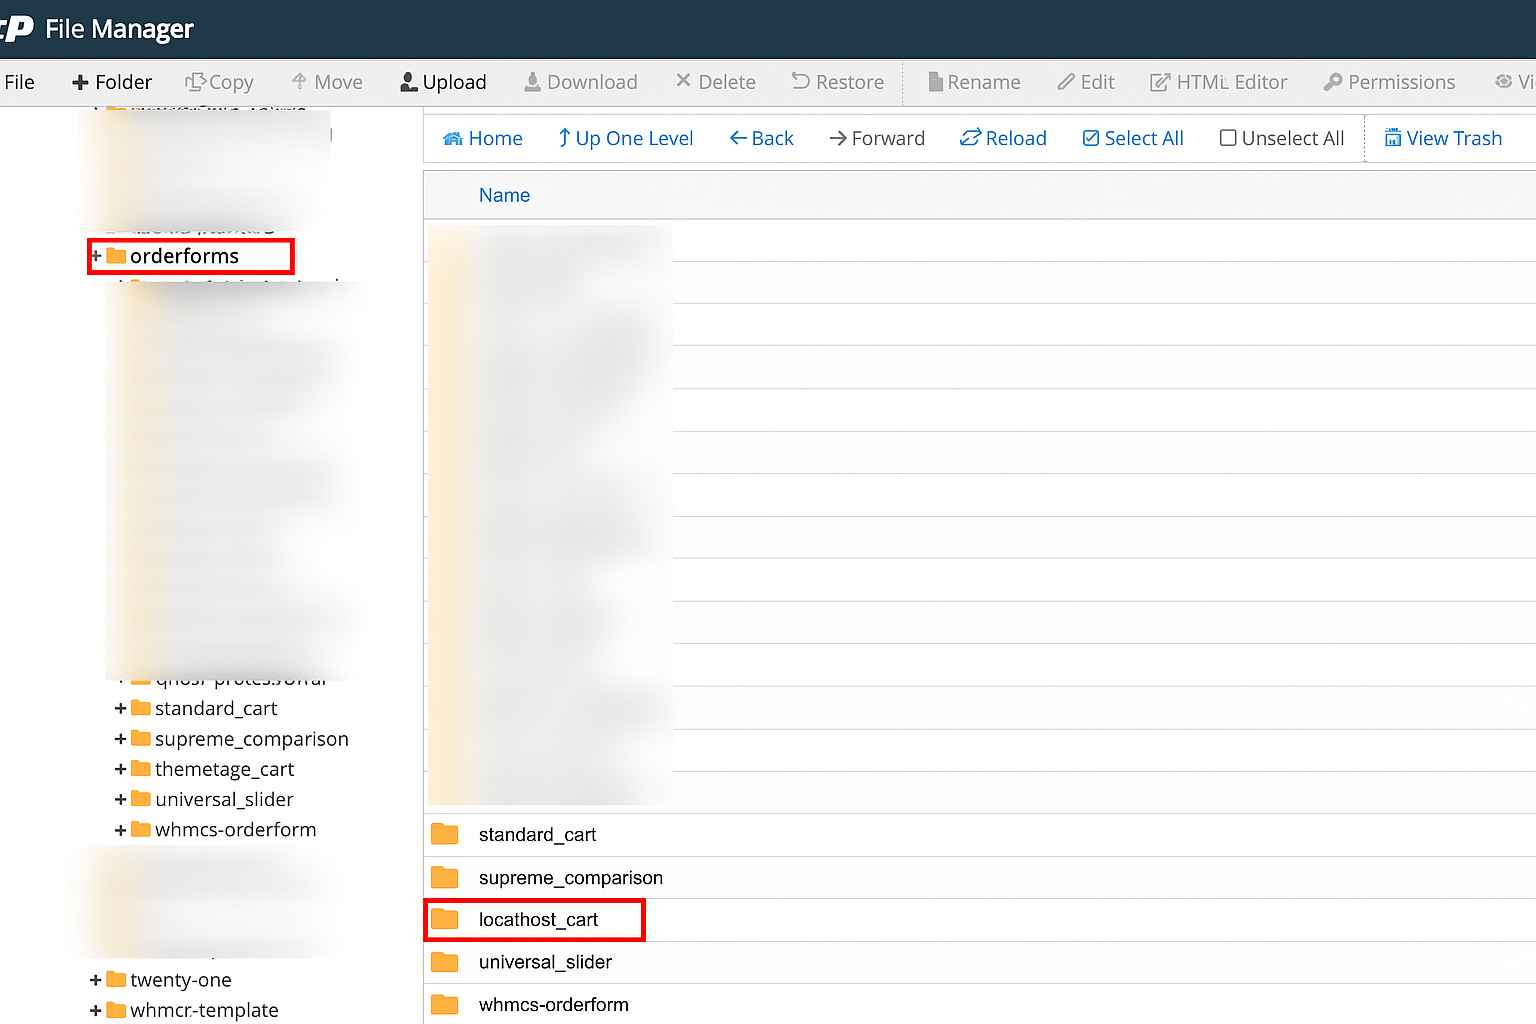
Add the "localhost_cart" orderform to the orderforms folder
Add overrides folder to the lang folder:
You can select our template and orderform from the General setting. To change the default template from the general setting:
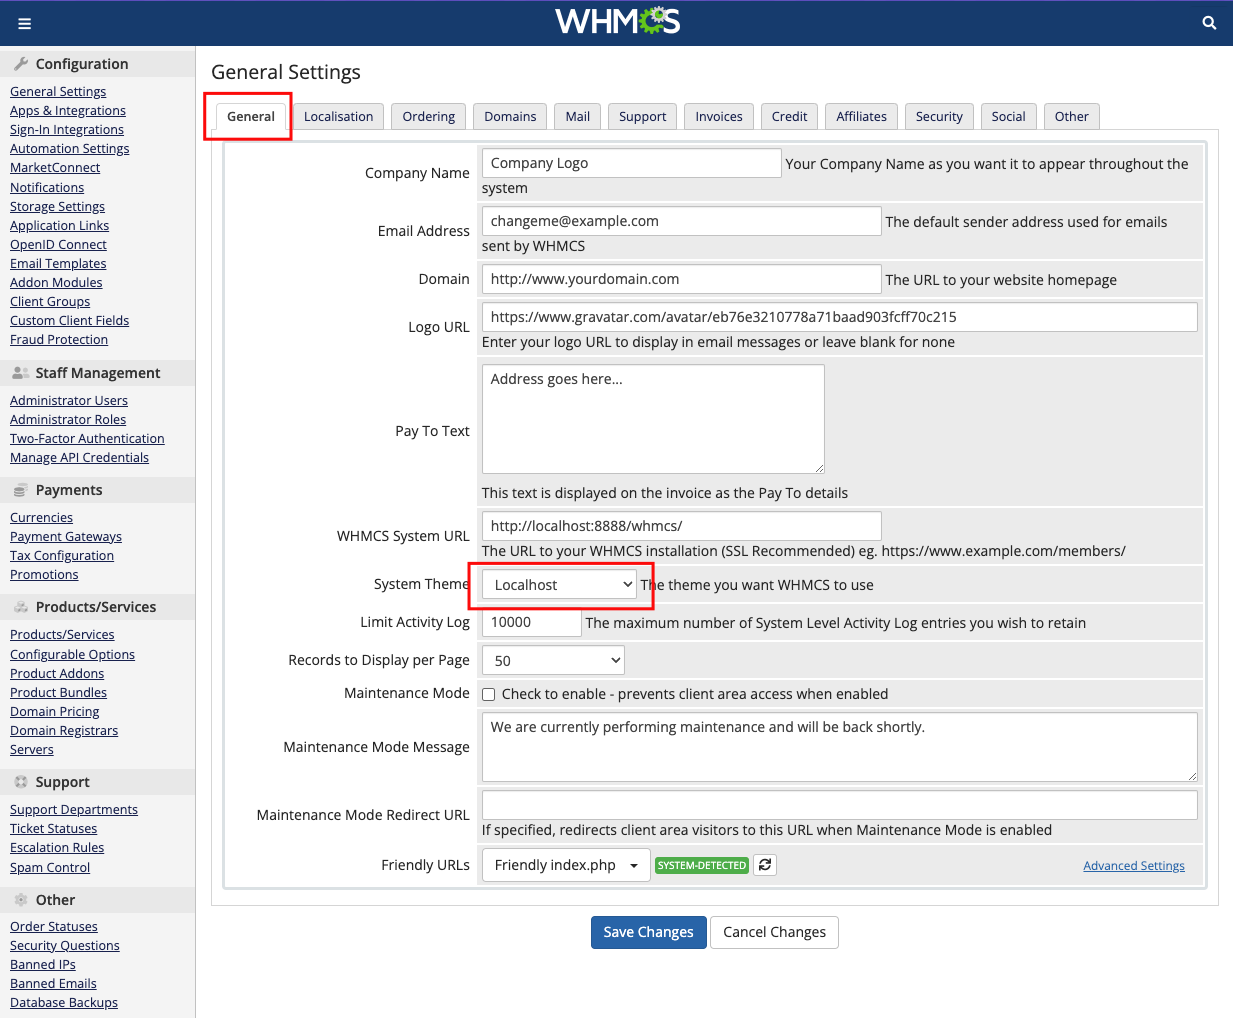
Click the setting icon right side of the navbar then click the general setting:
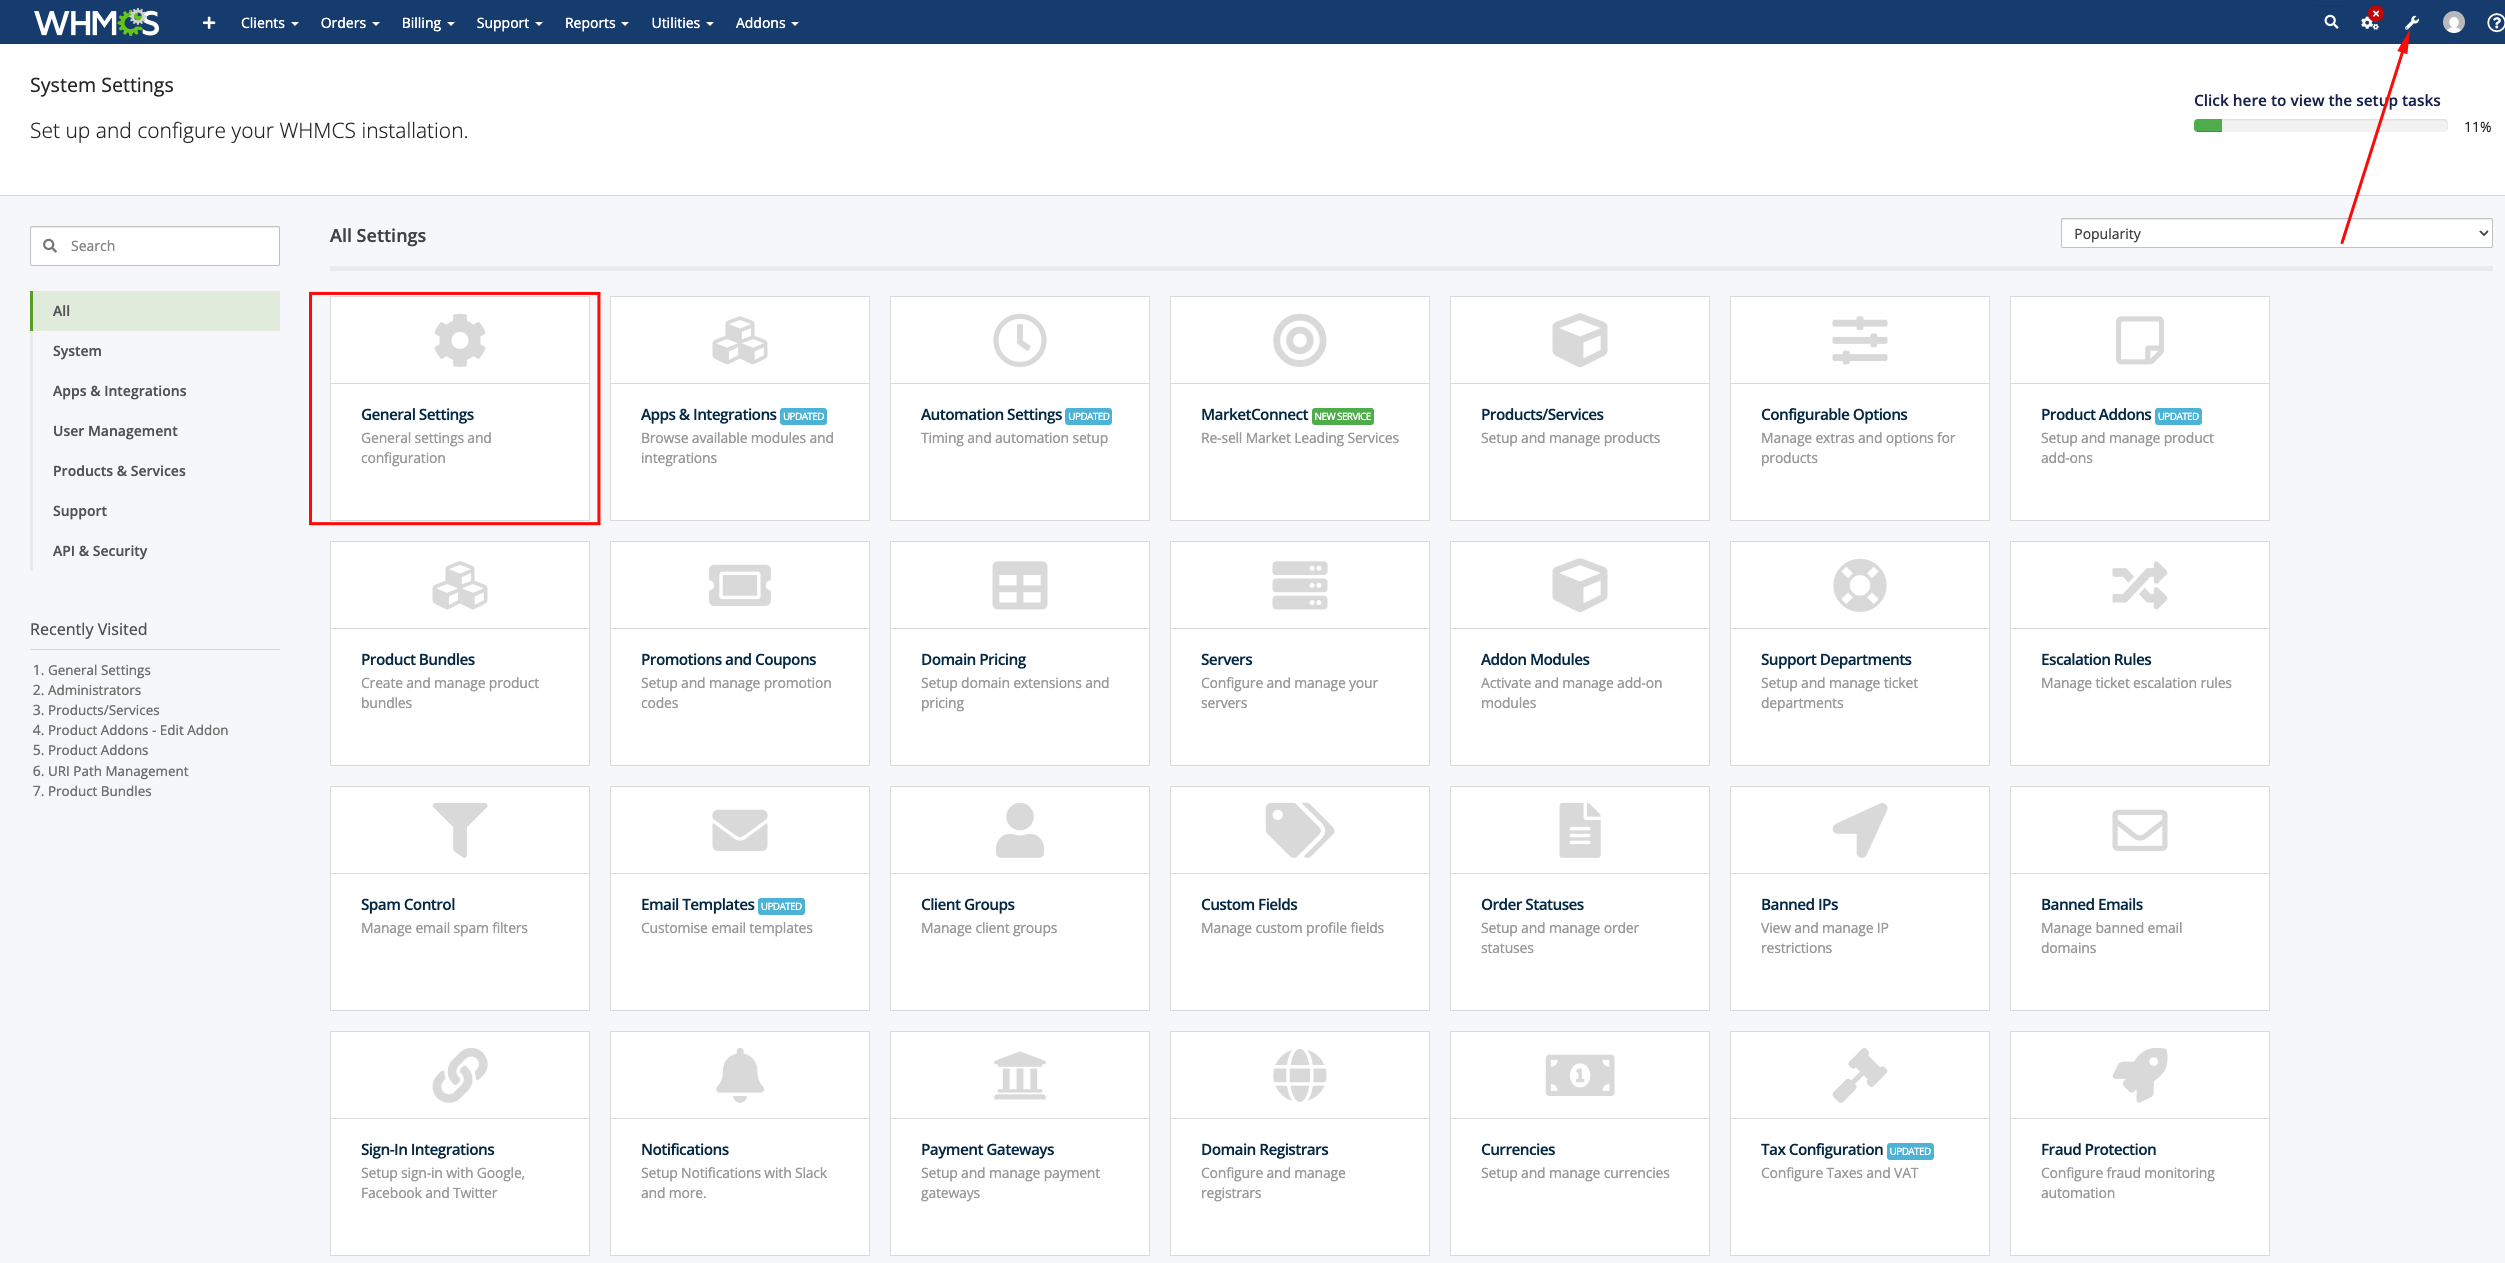
Go to the general setting > general then select the template like localhost:
Change the default Orderform from General setting:
In this General setting, click the tab Ordering then you can see the different types of the order form template. Now select the localhost Cart. Check the below image:
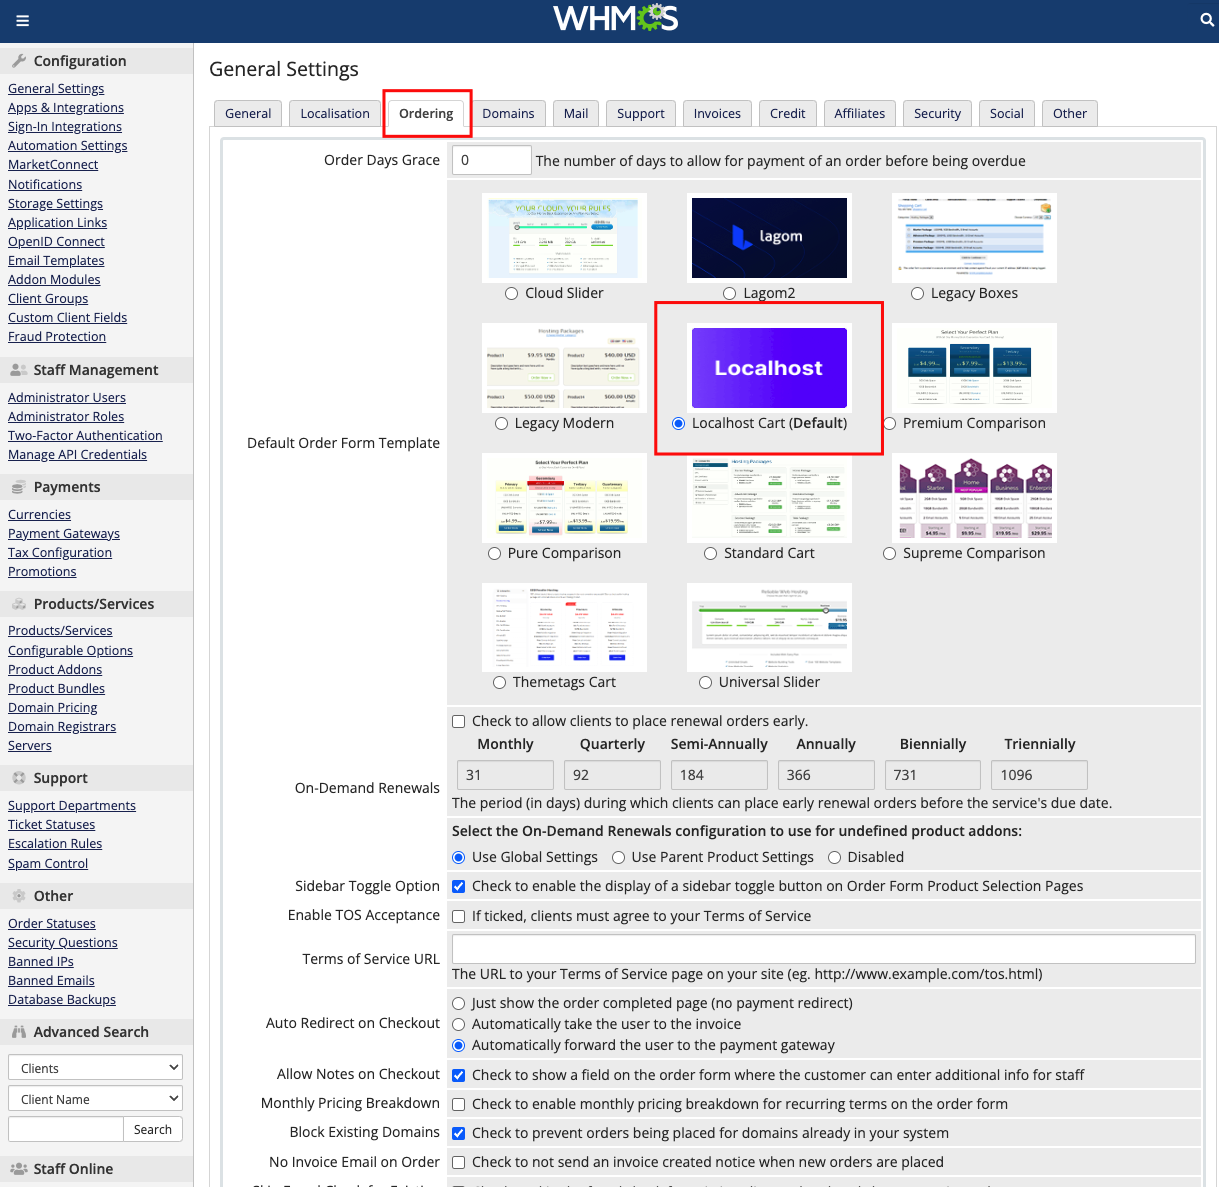
After selecting, this then clicks the Save Change button.
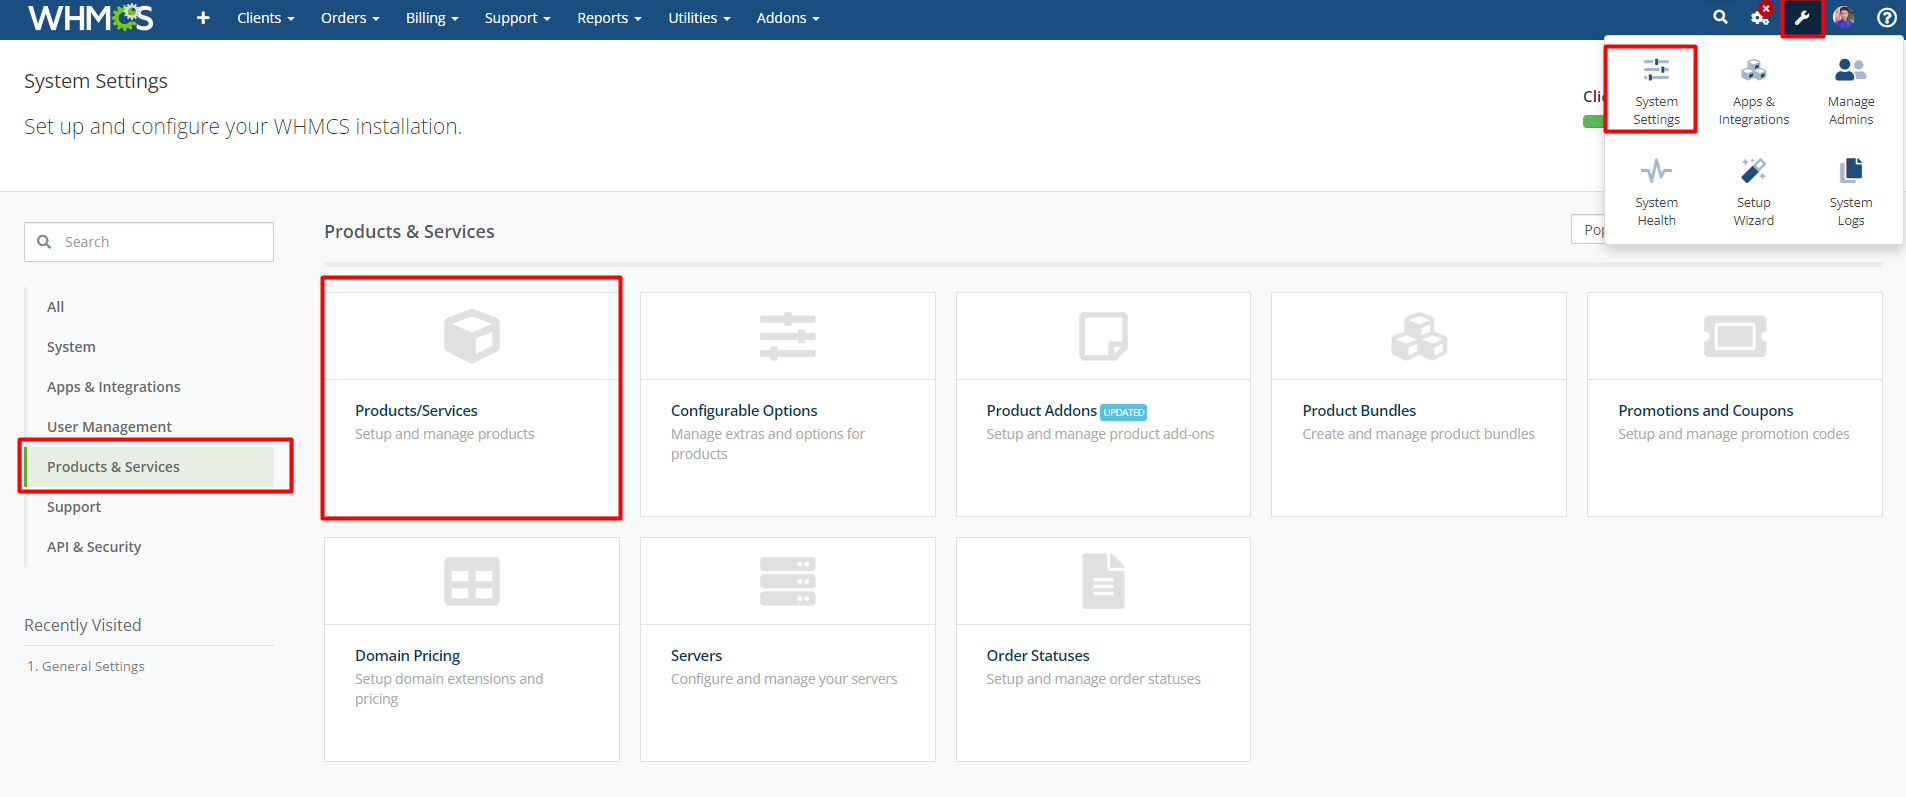
Configure your product or price from WHMCS admin panel:
First of all, log in to your whmcs admin panel then click the setting icon right side of the navbar> products/services follow the steps:
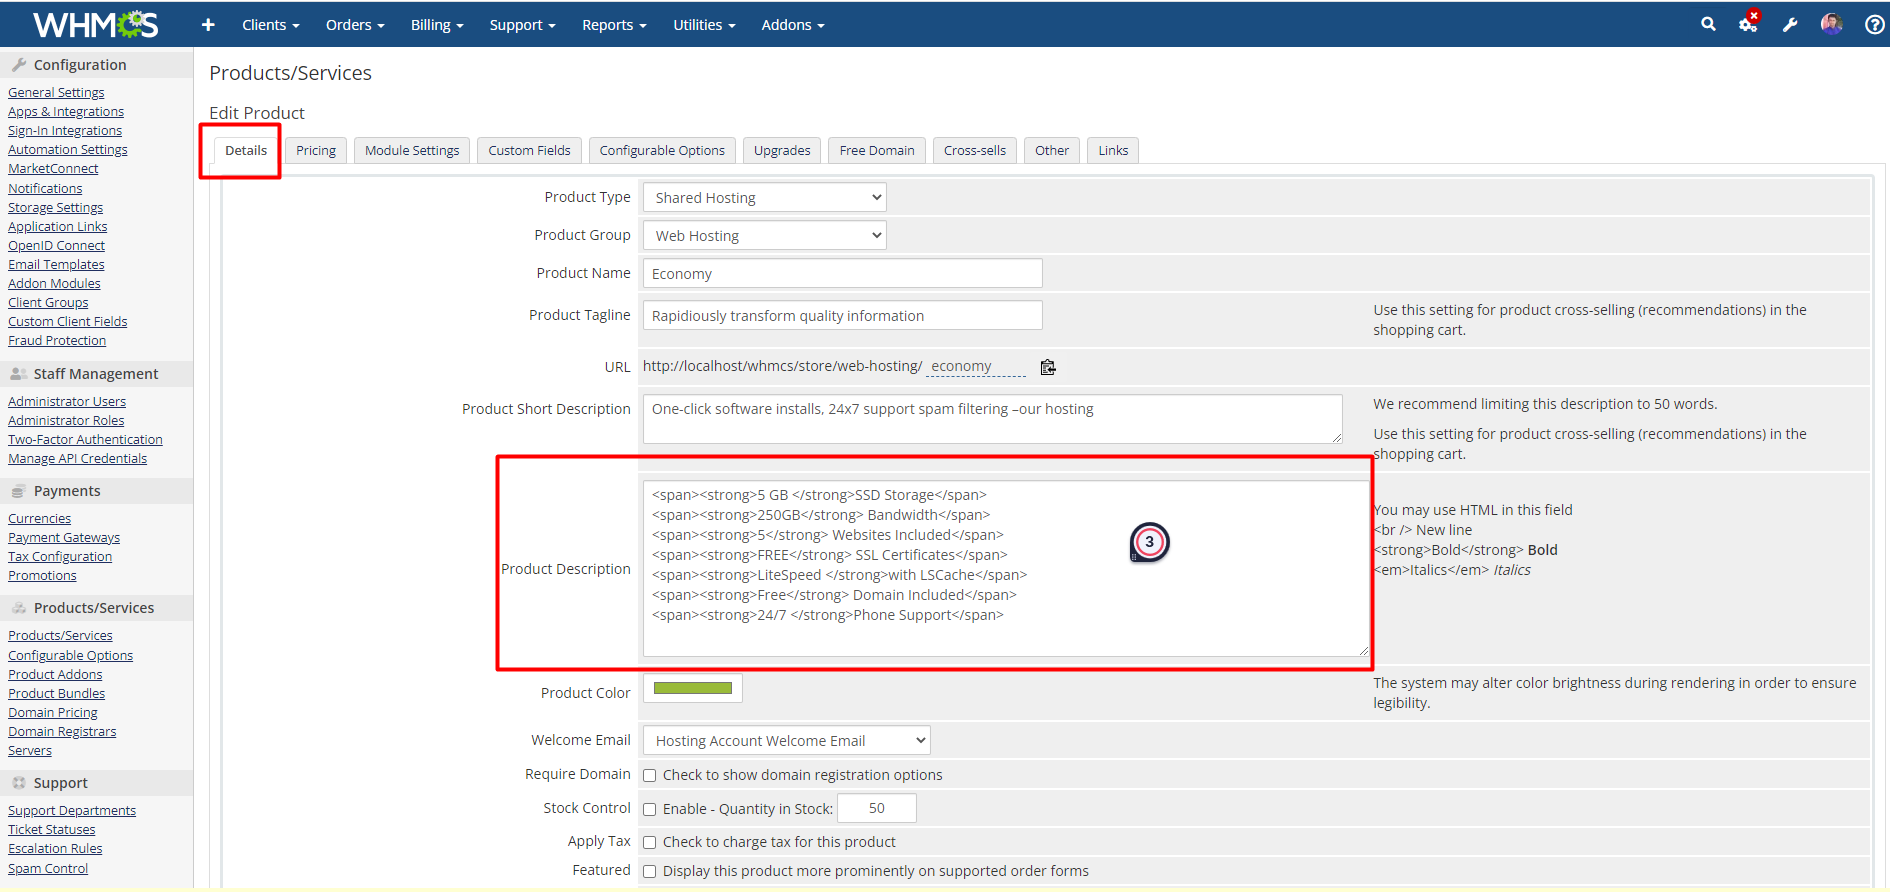
I hope you have already created your product group name and under the group then add the single product under the group. If you don't have this package then you should create one first. Then edit the single product package like the below images:
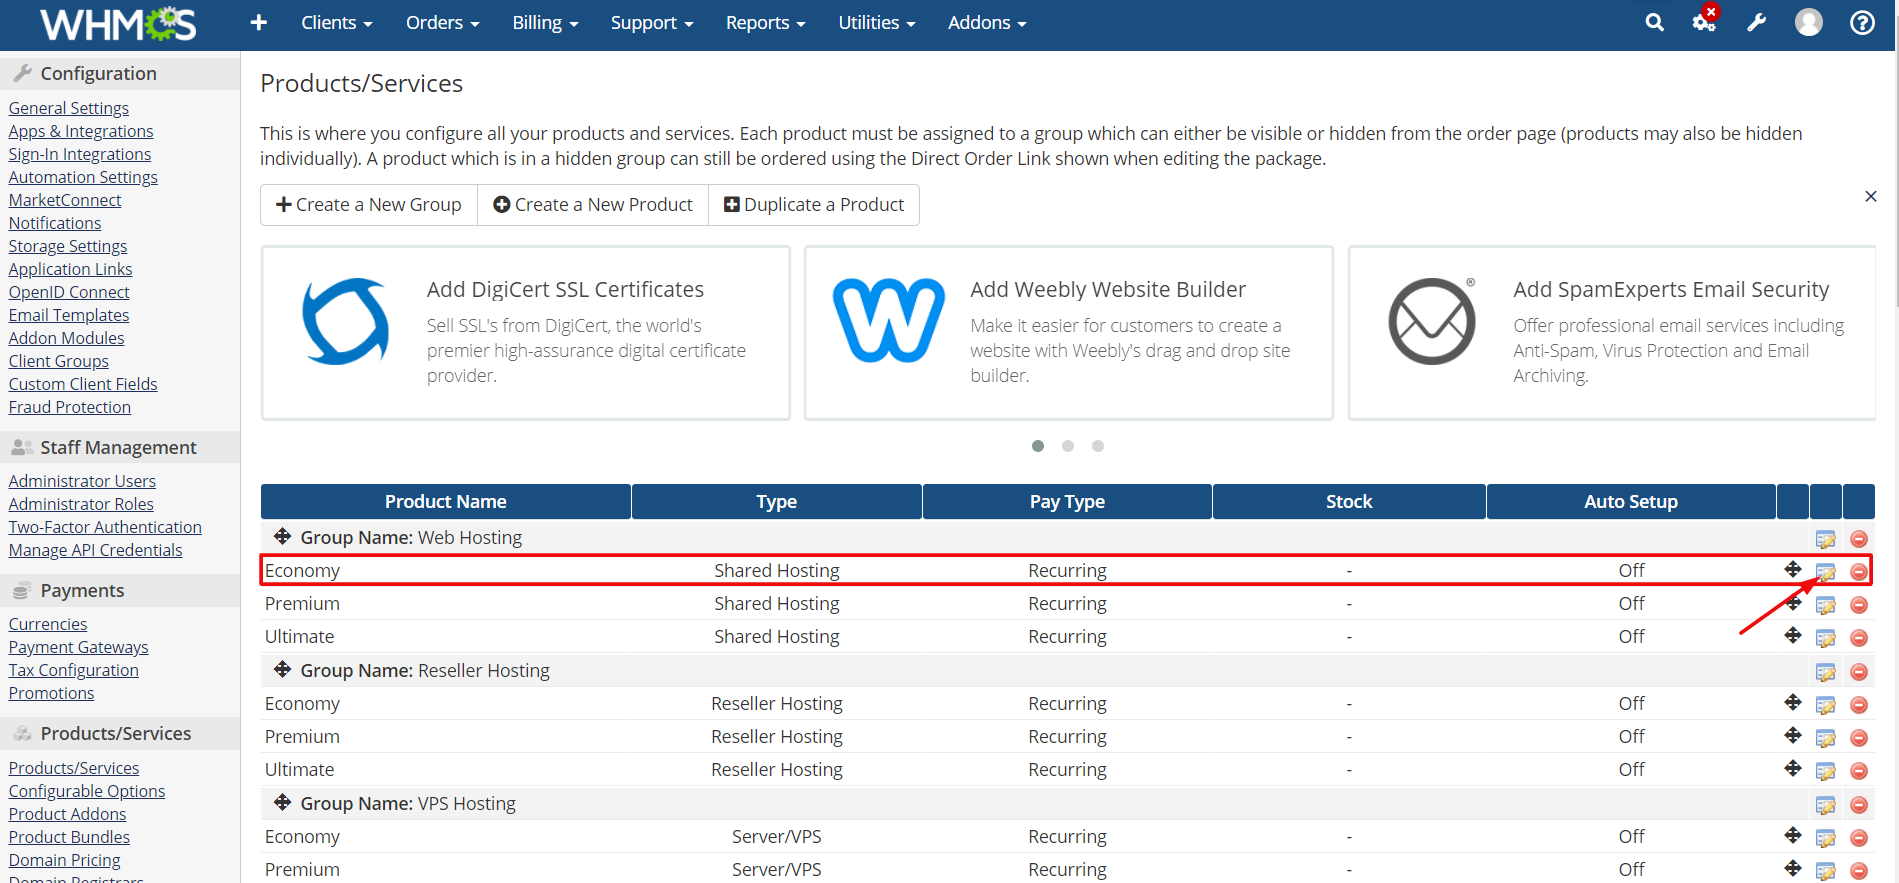
Click the edit icon then you can see the below image. Copy this code and paste into the product description field like below image. You have to change the text or value based on your plan and follow it for the rest of the plan and product.